TeleHealth Simplified: Step-by-Step Guide with 75Health

In today’s fast-changing healthcare sector, the ability to offer quality care outside hospitals matters more than ever.
That’s where our powerful TeleHealth feature steps in—your doorway to offer safe, handy, and quick medical services virtually. Whether you’re from a big organization or a solo doctor trying to meet patient needs everywhere, our comprehensive guide will take you through each step of using this transformative feature. Let’s see how 75Health TeleHealth doesn’t just make care delivery better. Yet, it also reshapes the healthcare experience for doctors and organizations.
Here’s a Quick Definitive Guide on How to Use Our TeleHealth Feature:
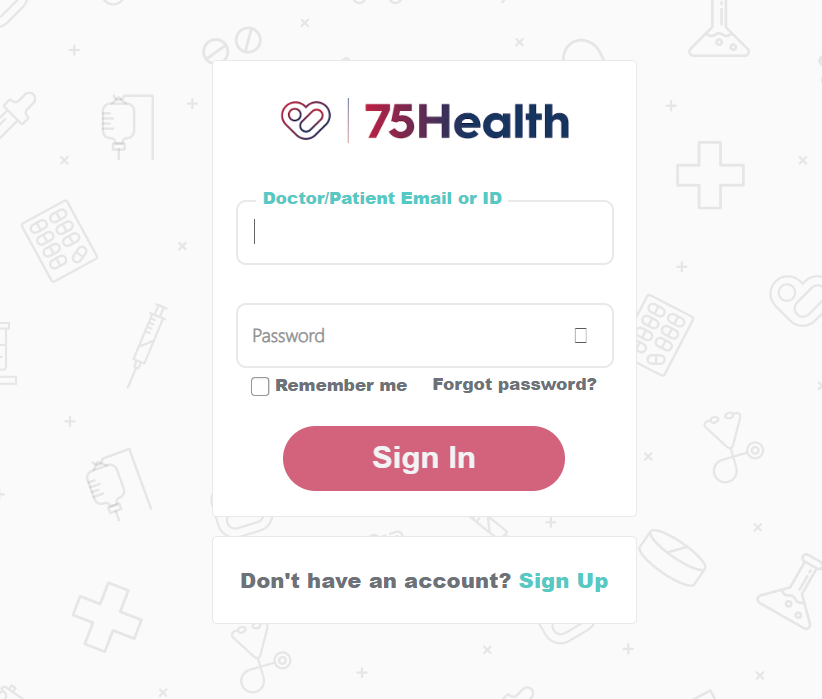
1. SIGN UP/IN ACCOUNT:
Sign up to our 75Health EHR account.

Or If you already have an account, simply sign in to get started.
2. ACCESS THE CALENDAR:
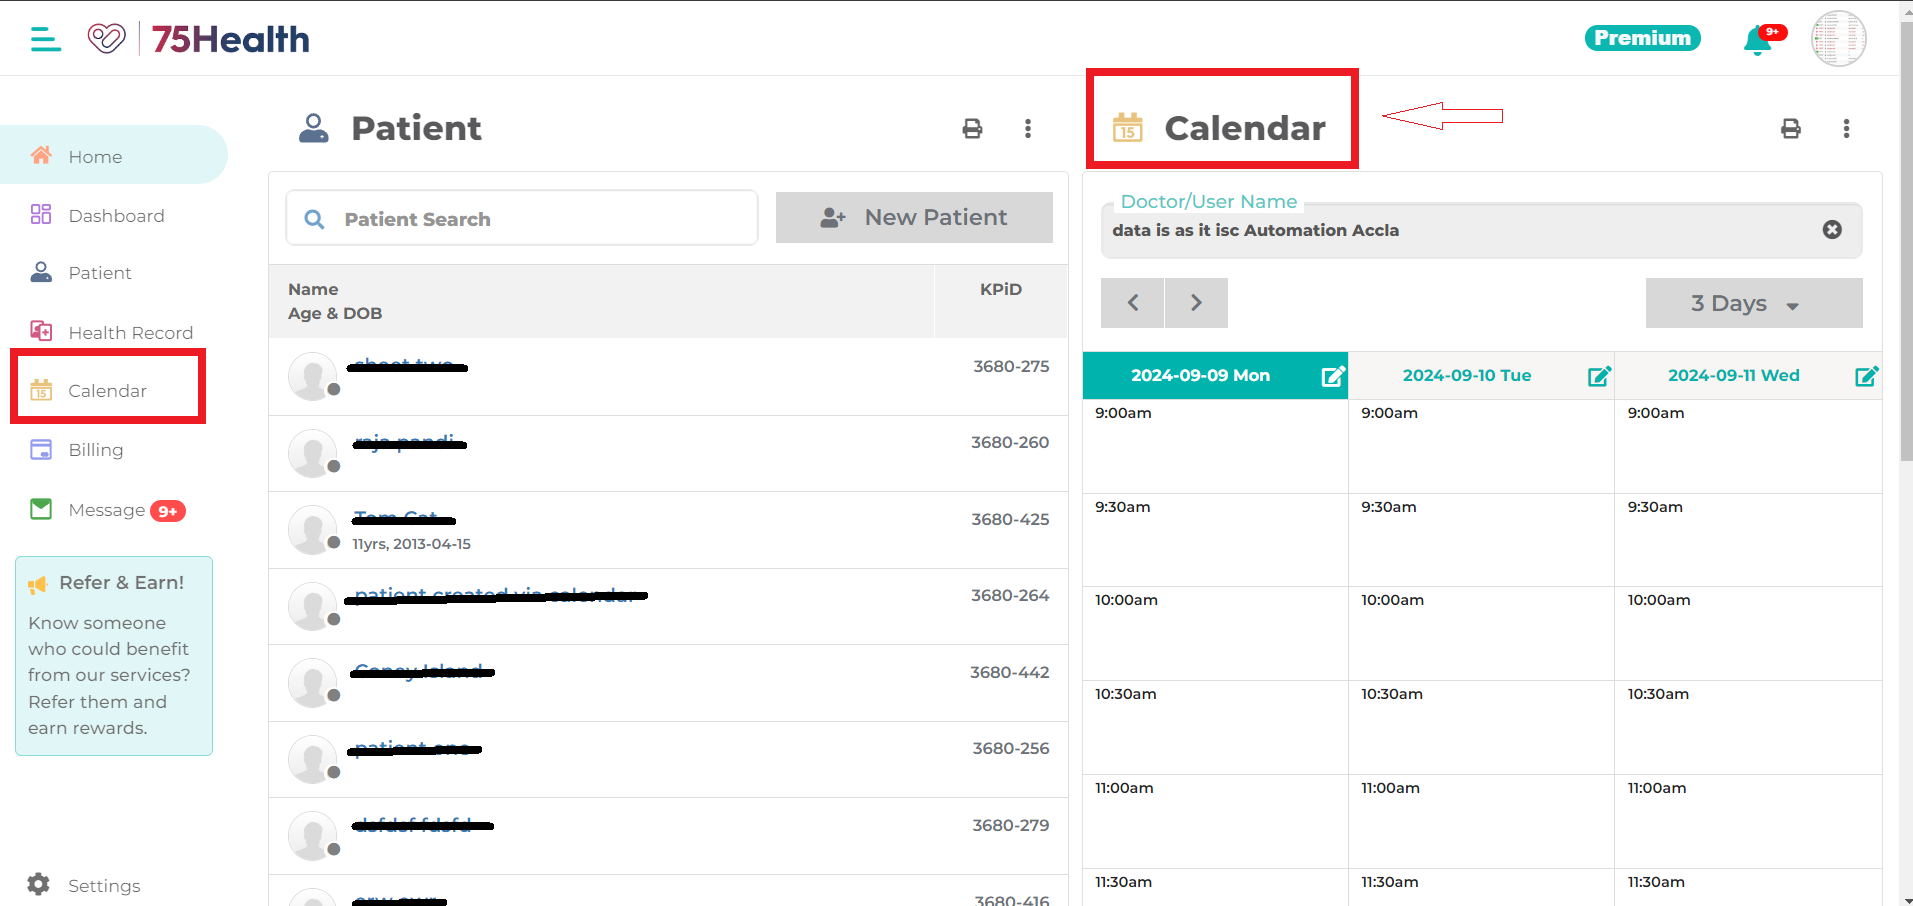
Navigate to the Calendar—either from the Home page or the Side Navigation Menu, whichever is convenient for you.
3. CHOOSE A DOCTOR/TIME SLOT:
For organizations: If you use TeleHealth from your organization’s portal. You can choose the doctor’s name in the search bar. Then pick the time slot you want to book your appointment.
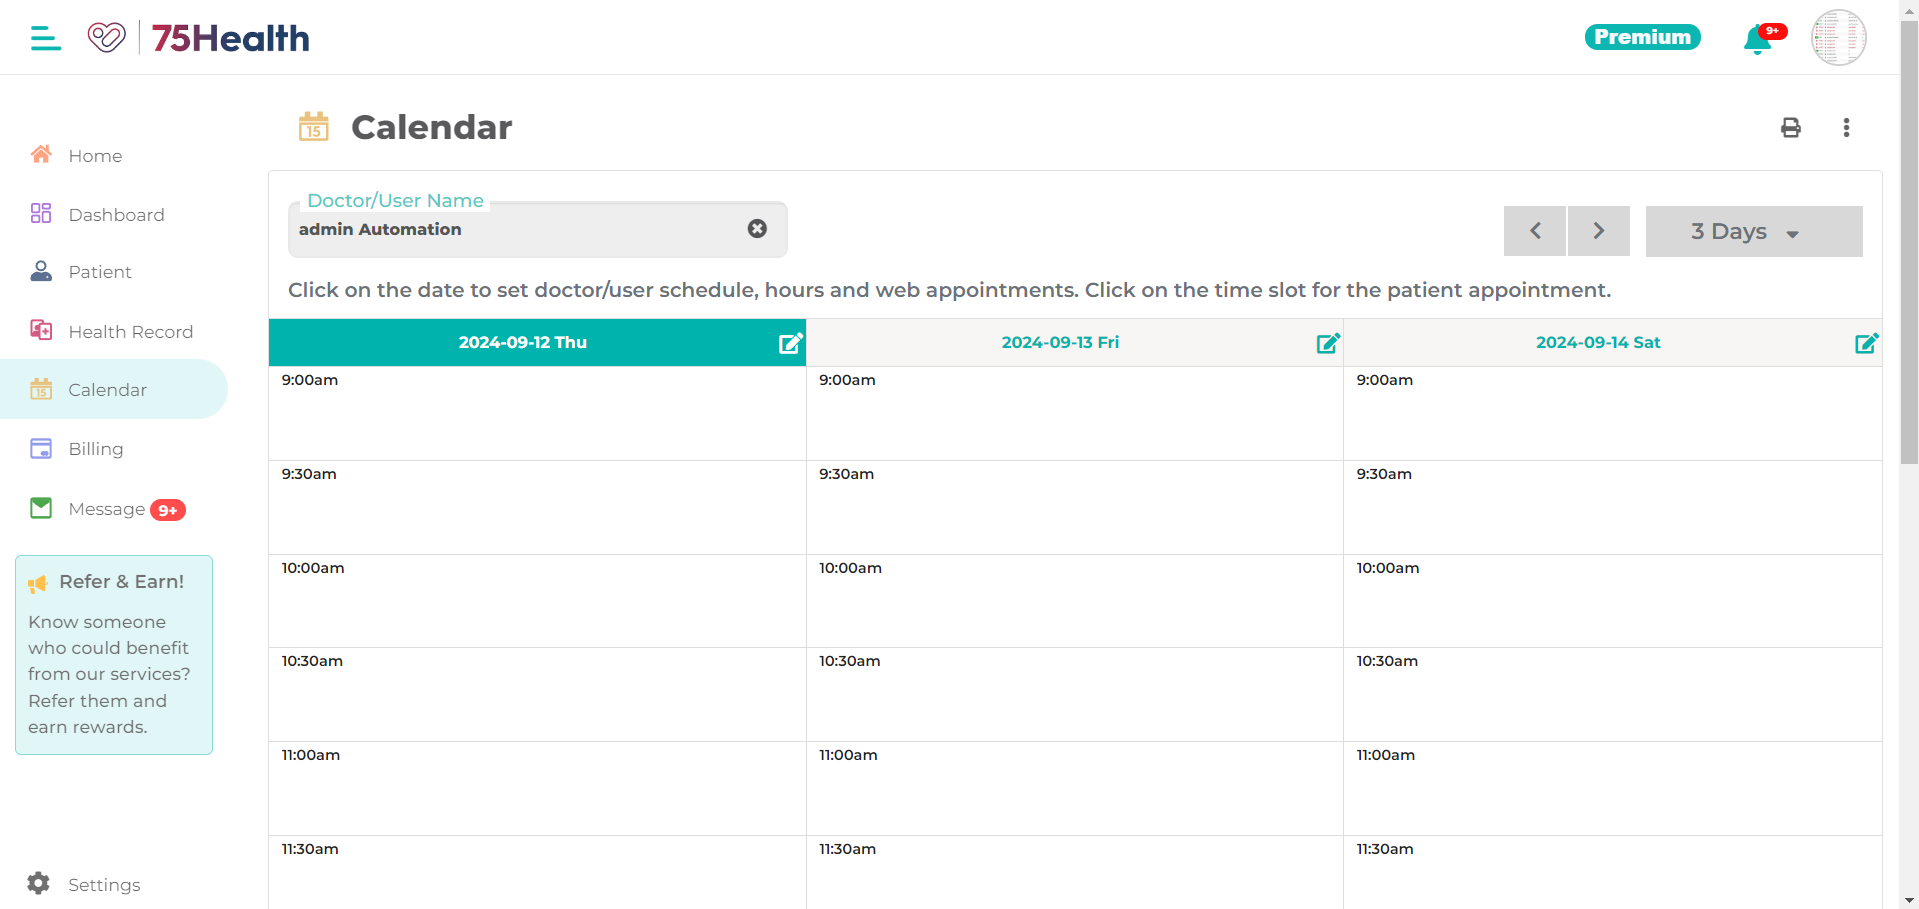
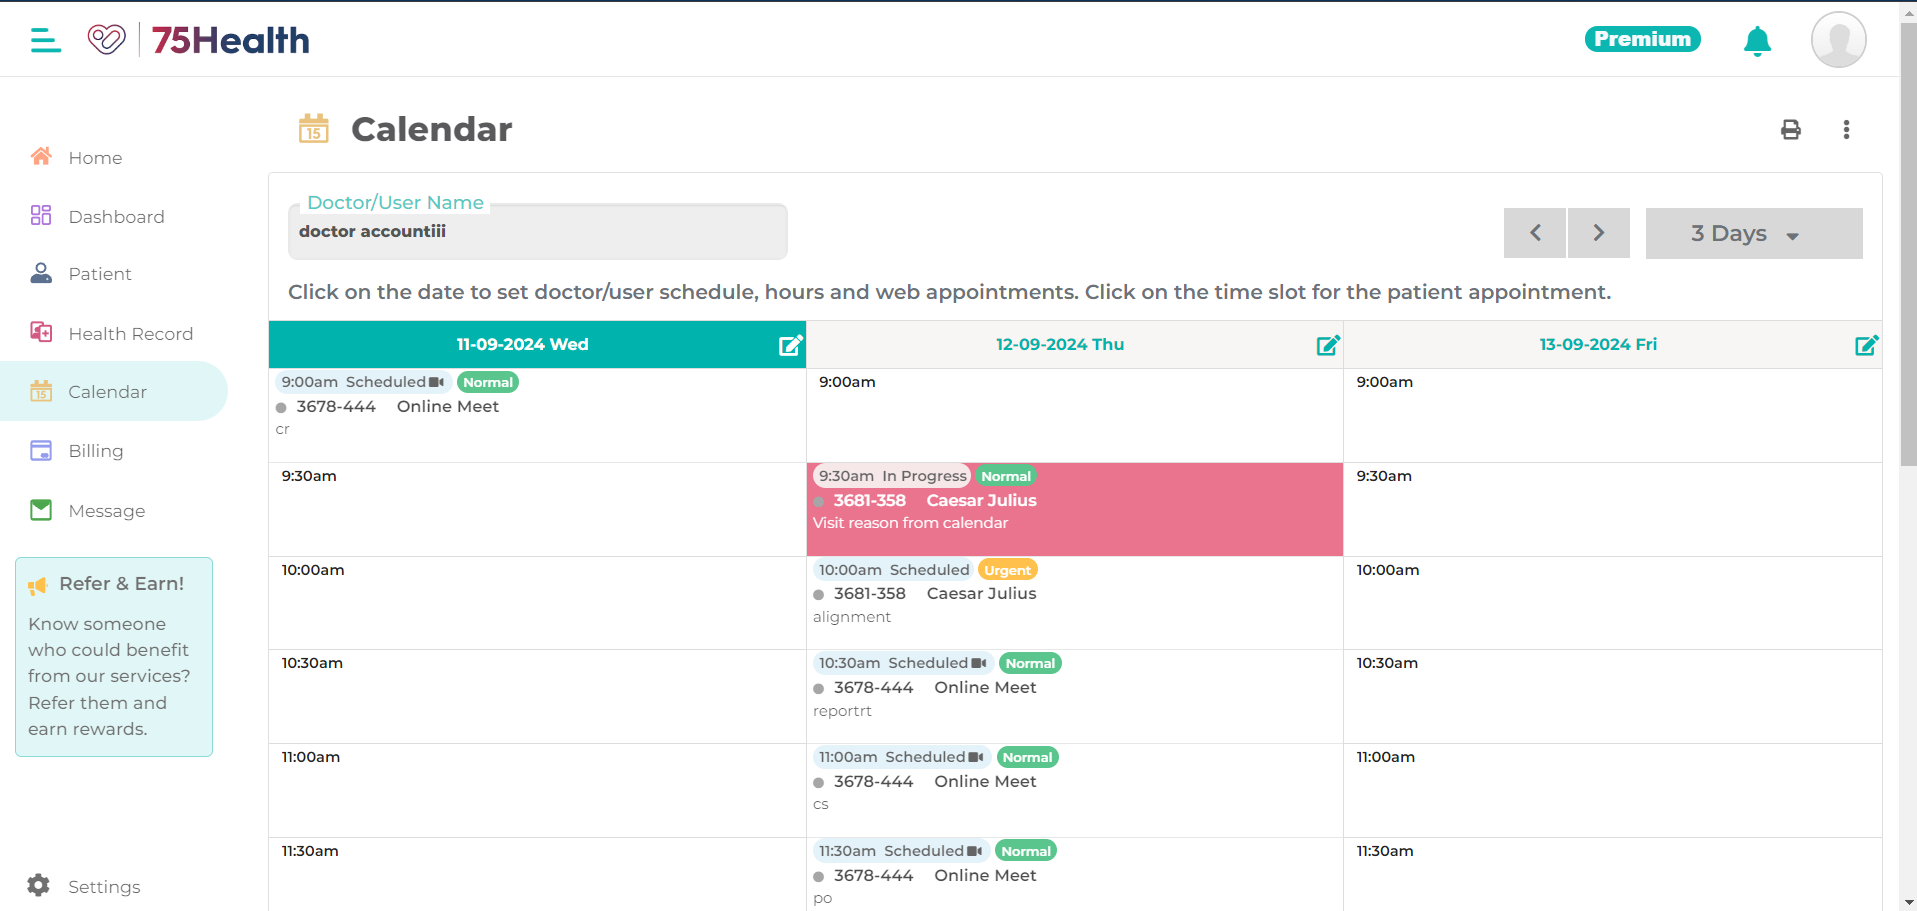
For Solo Practitioners or Doctors: If you’re on your own or sign in through the Doctor Portal, your name gets set. This means you just need to pick a time slot, which makes booking simpler.
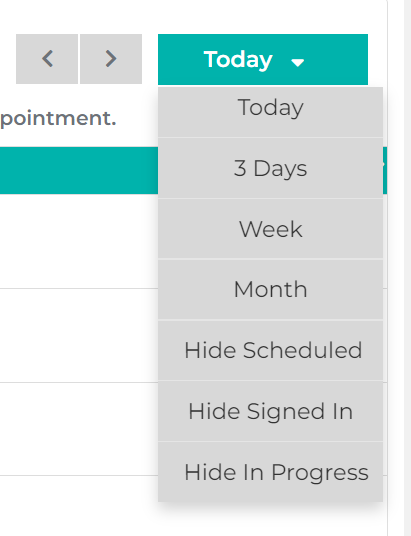
Choose your calendar view option by selecting from the dropdown menu.
4. MANAGE APPOINTMENTS:
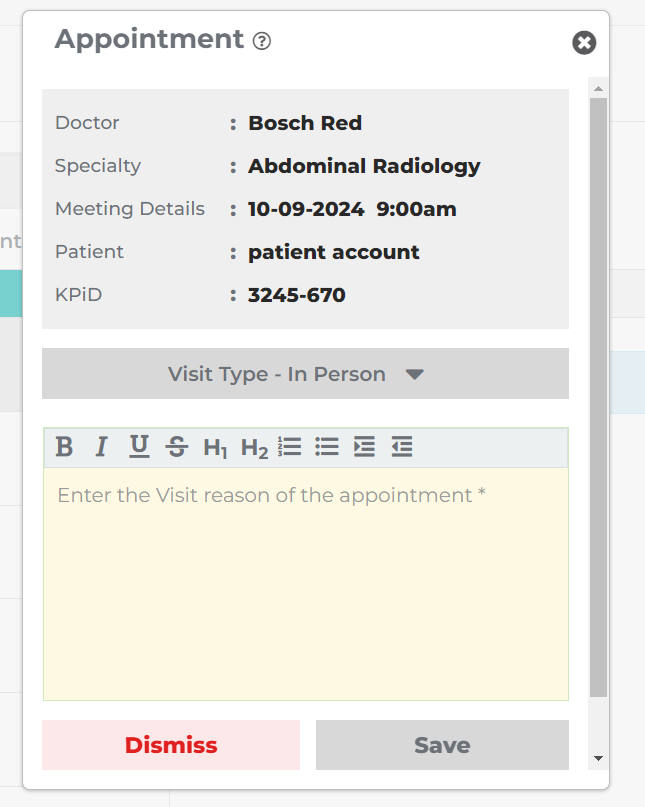
1. Patient Selection
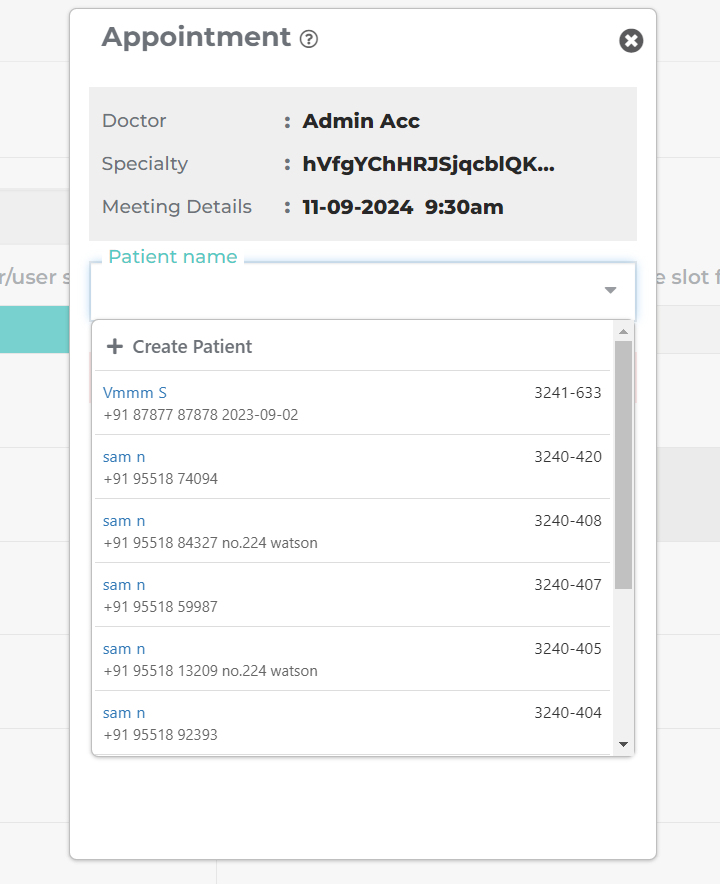
Select Existing Patient: Simply choose the patient’s name from the list for the appointment.
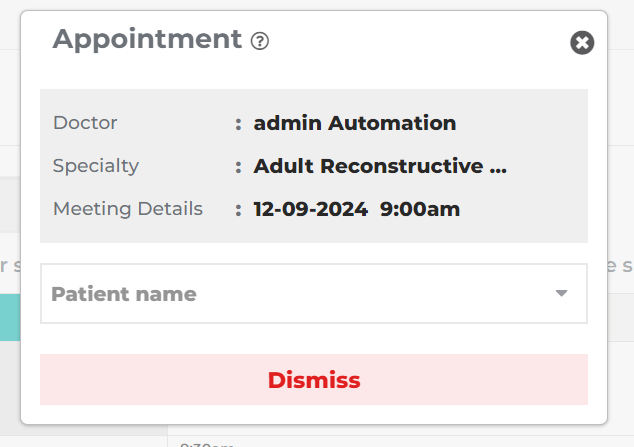
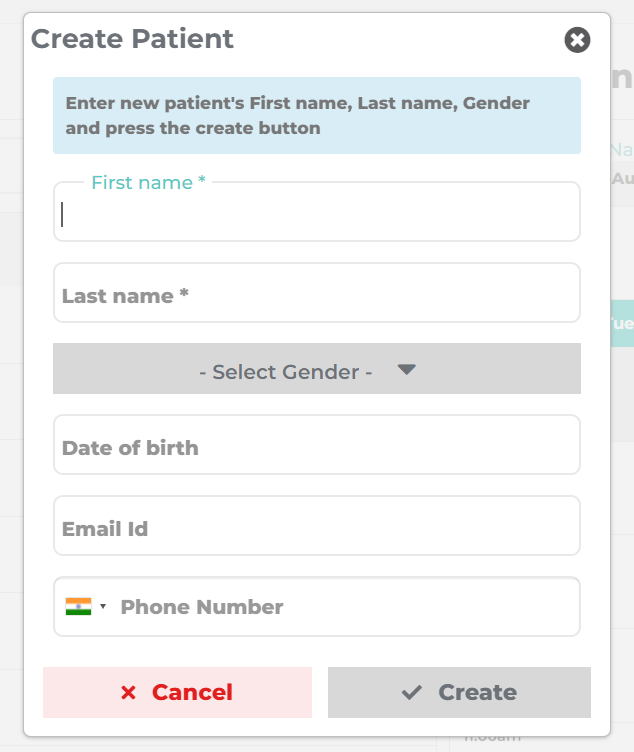
Creating a New Patient: If the patient is not listed, follow these steps:
Click Create Patient → Add the Necessary Details → Click Create button.
2. Select the Appointment Type
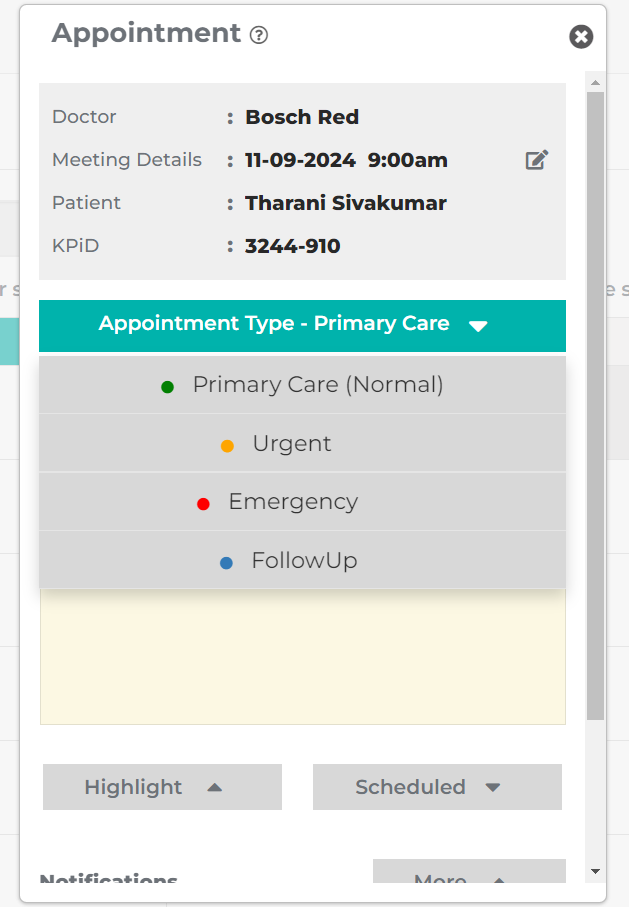
After selecting or creating a patient, choose whether the visit is for primary care, urgent, emergency, or follow-up.
3. Select Visit Type
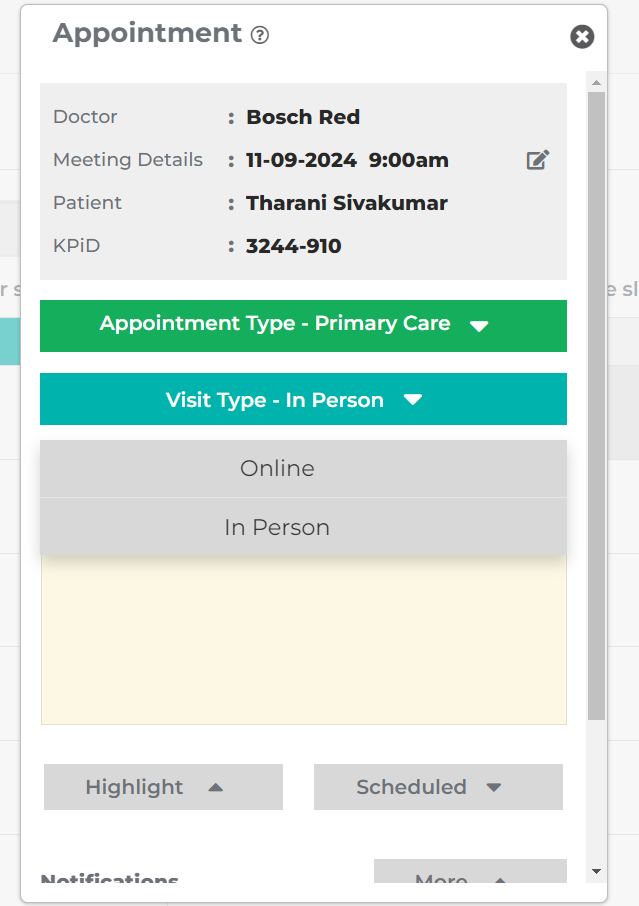
Choose the visit type. While the TeleHealth feature is designed mainly for online appointments, in-person visits can also be selected if necessary.
4. Enter the Reason for the Visit
Write a short reason for the visit, such as “routine check-up” or “flu symptoms.”
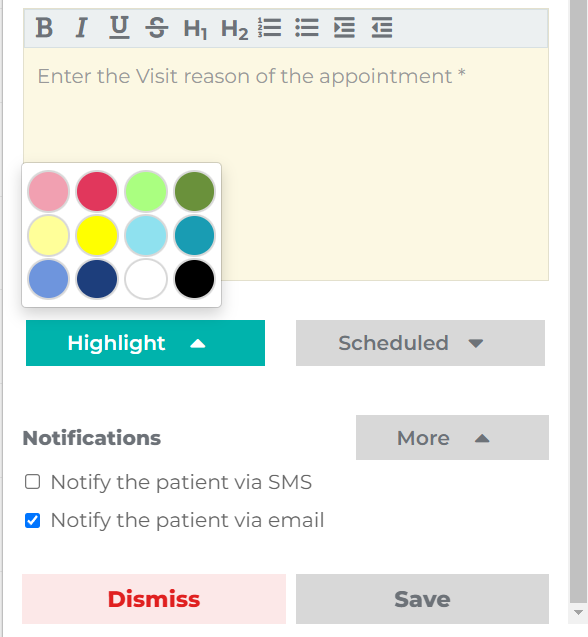
5. Highlight the Appointment
To highlight the appointment with a specific color in the calendar:
Click Highlight →Choose the Desired color→Click save.

5. APPOINTMENT CONFIRMATION:
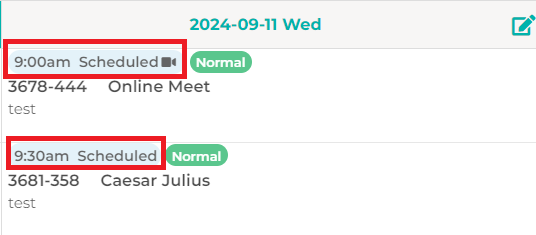
Once your appointment is scheduled, you can easily view it in the calendar.
For better clarity, your appointments are differentiated:
- Online consultations will display a video icon.
- In-person visits will show as plain entries.
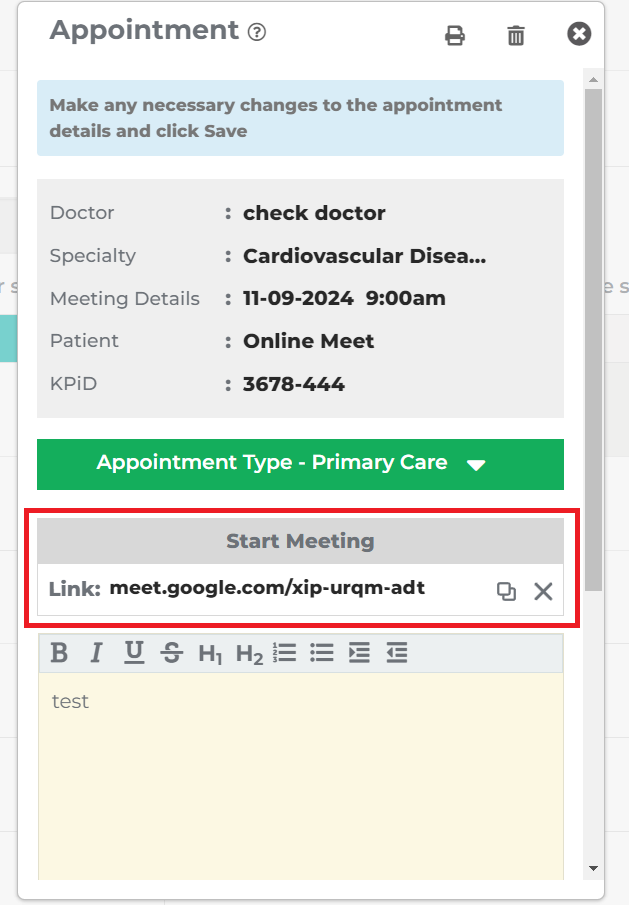
After your appointment is confirmed, a “Start Meeting” button and a meeting link will be provided. However, the link will only become active at the scheduled time, so you should join at the appropriate moment.
NOTE:
- For doctors, the schedule will automatically sync with Google Calendar. You can join the appointment by clicking the link in the 75Health calendar or by opening Google Meet from your Google Calendar.
- The patient will receive an appointment notification with details and a link via email, or they can view the appointment in their 75helath calendar when they log in.
These simple, outlined steps make it easier than ever to schedule and attend virtual consultations with our TeleHealth feature.
But still, wondering what sets us apart?
Here’s the difference: While others require separate app installations for meetings, our 75Health Telehealth feature is seamlessly integrated with Google Meet. This means no extra downloads or complex setups—Google Meet alone ensures a smooth and effortless consultation experience.
So why are you still waiting?
Experience the simplicity and convenience of virtual healthcare with 75Health Telehealth NOW!
Stay tuned to our blog for exciting updates on upcoming features and more!
